Lab 9: Continuous Compliance
Scenario
In the domain of compliance management, Security and Operations teams collaborate on corporate IT security policies. Despite their efforts, disjointed tools, workflows, and priorities hinder them. The SecOps Automation platform steps in, enabling effective compliance enforcement and automated remediation. You’ll learn how to use Automation for Secure Hosts (SecOps add-on for Automation Config) to manage compliance effectively.
Task A. Create Target - Windows Server 2019 (Skip if you already created this Target)
- Click Targets in the side menu to open the Targets workspace and view your targets
- Click Create button
- Input the following details
- Name =
Win2019 - Description =
Windows Server 2019 - All masters = (Checked)
- Criteria
- Target type (1) =
Grain - Grain key (1) =
osfinger - Grain value (1) =
Windows-2019Server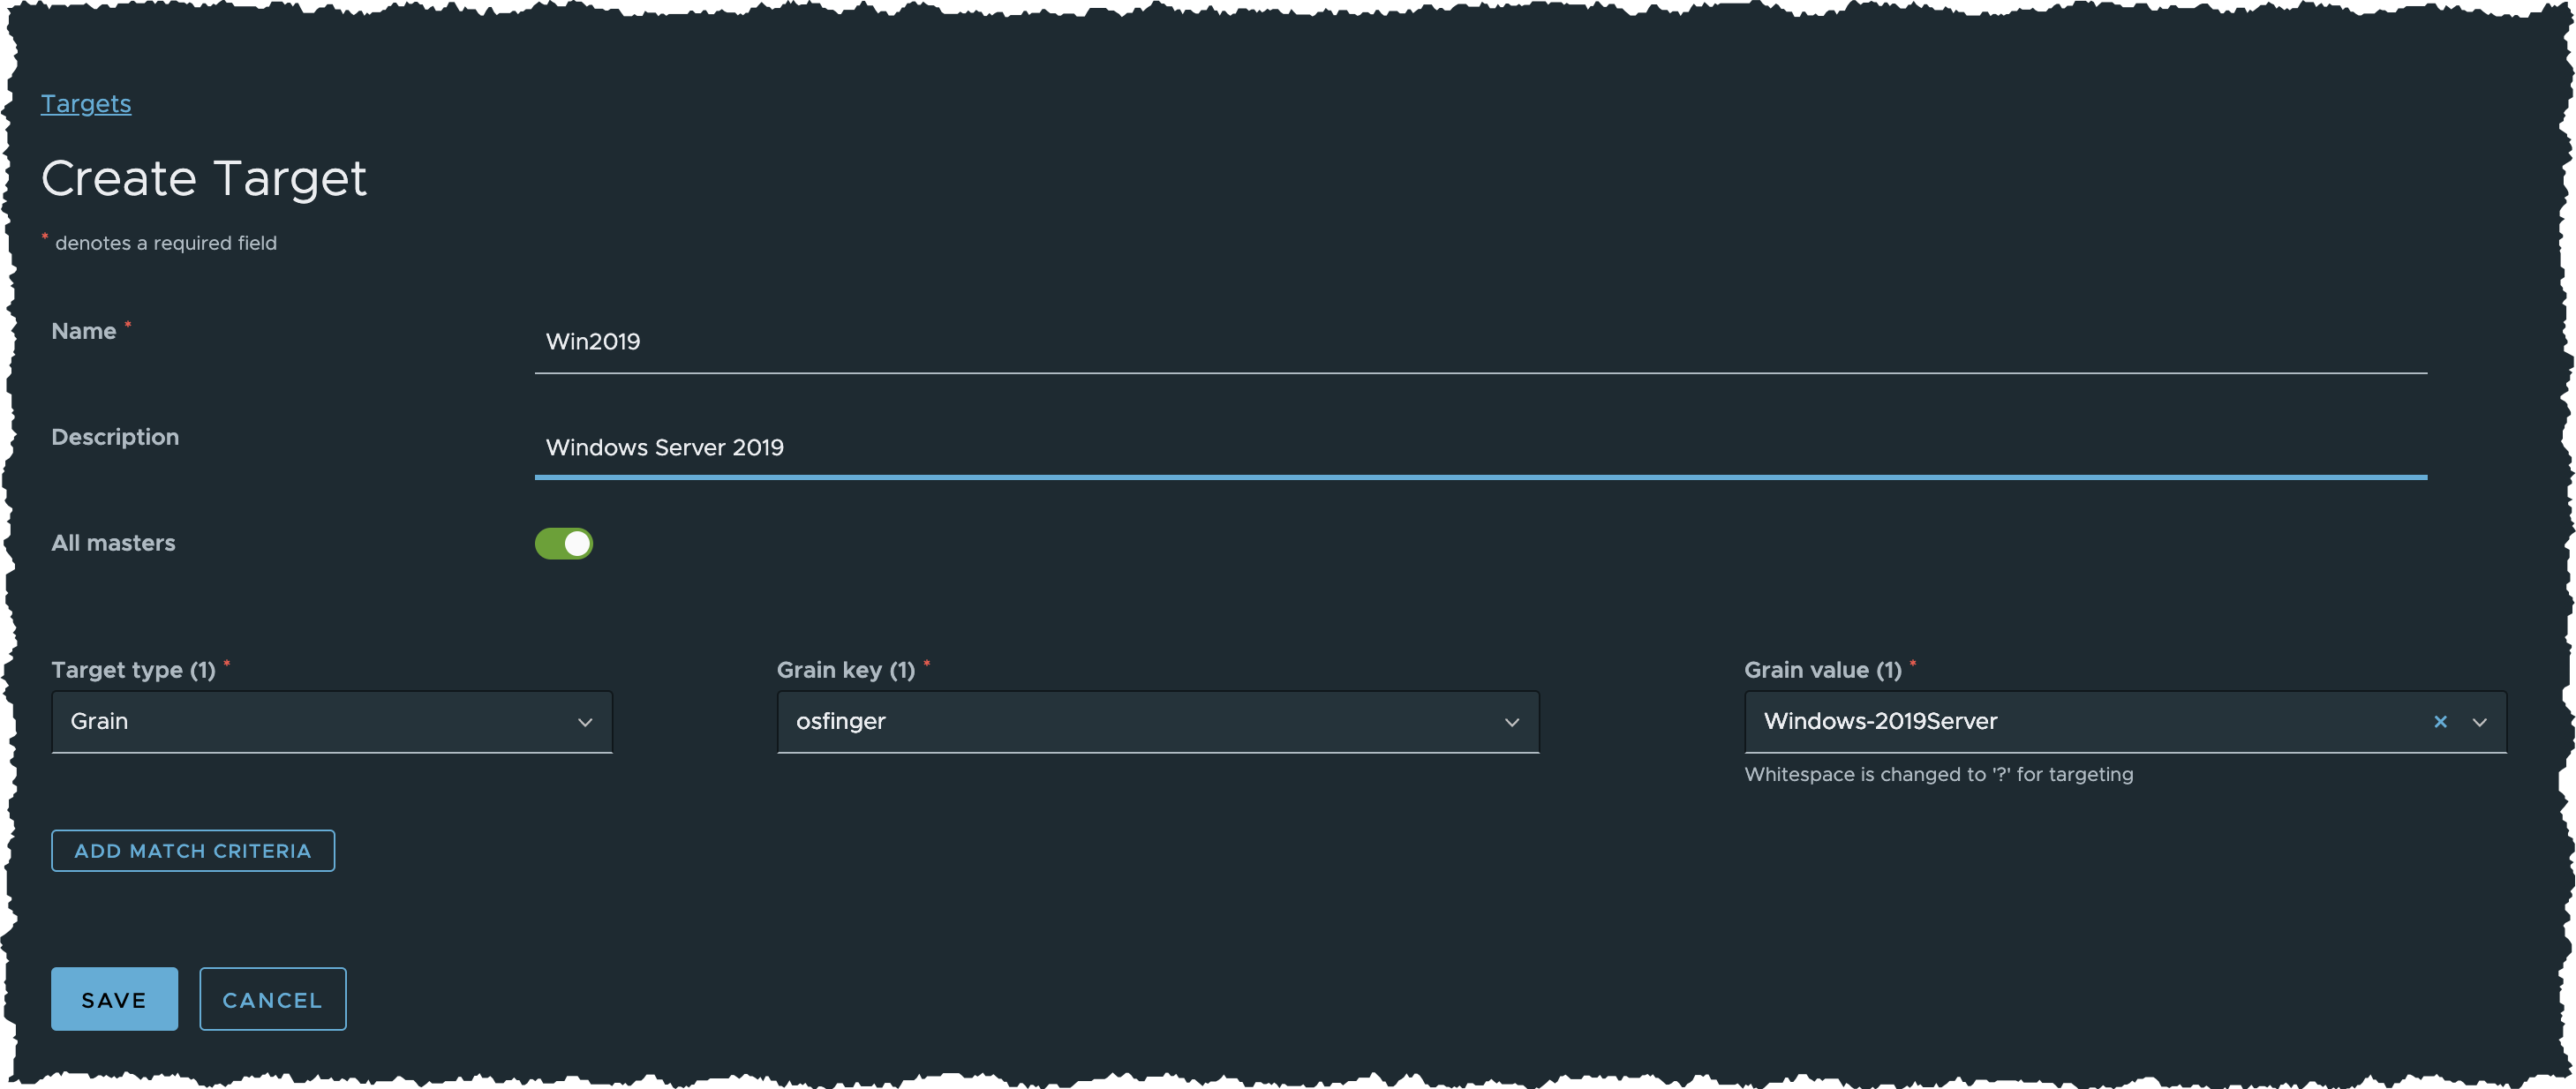
- Target type (1) =
- Name =
- Input the following details
- Click SAVE button
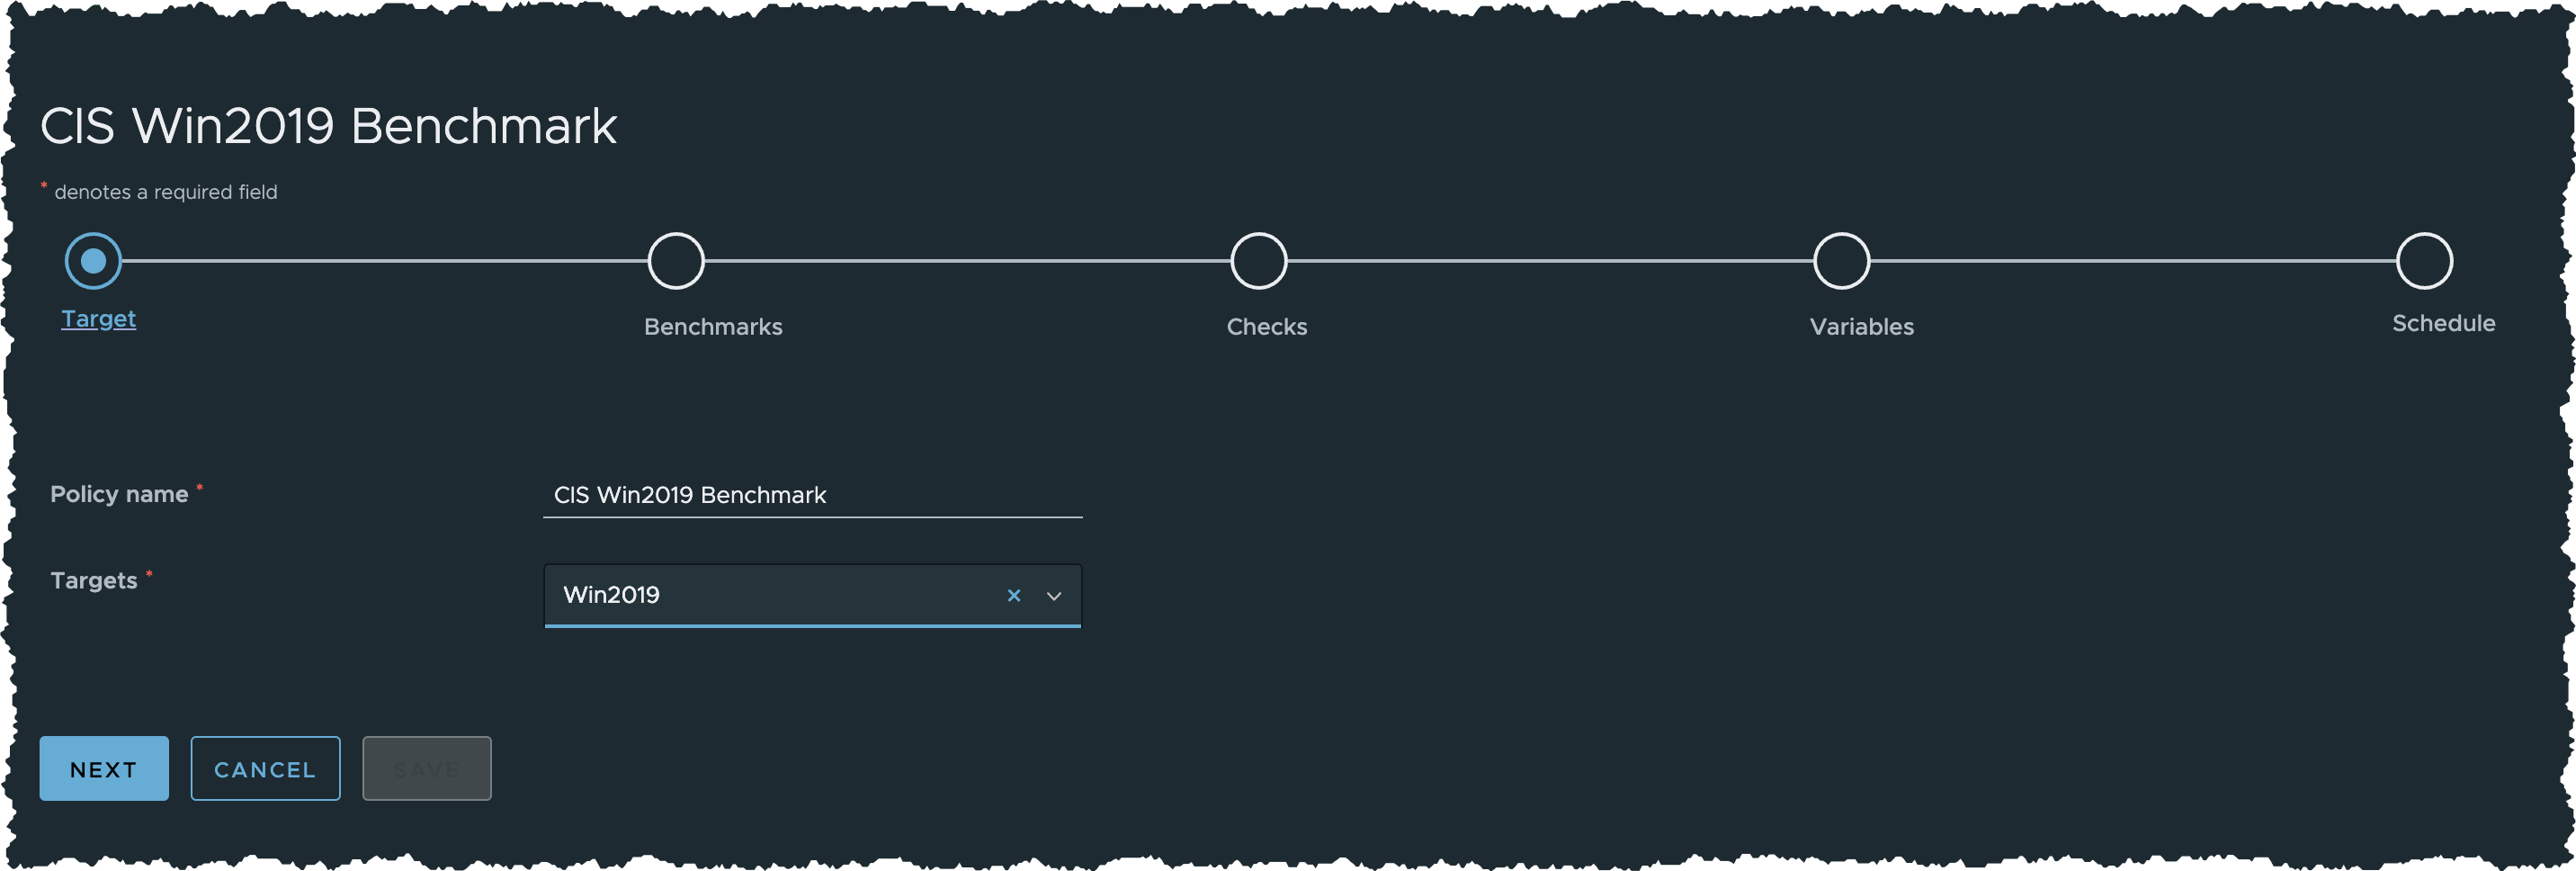
Task B. Create Policy
- Click Compliance > Policies from the side menu
- Click CREATE POLICY button to create a new policy
- In the Target step page:
- Input the following details
- Policy name =
CIS Win2019 Benchmark(the job you have created in the previous task) - Targets =
Win2019
- Policy name =
- Click NEXT button
- Input the following details
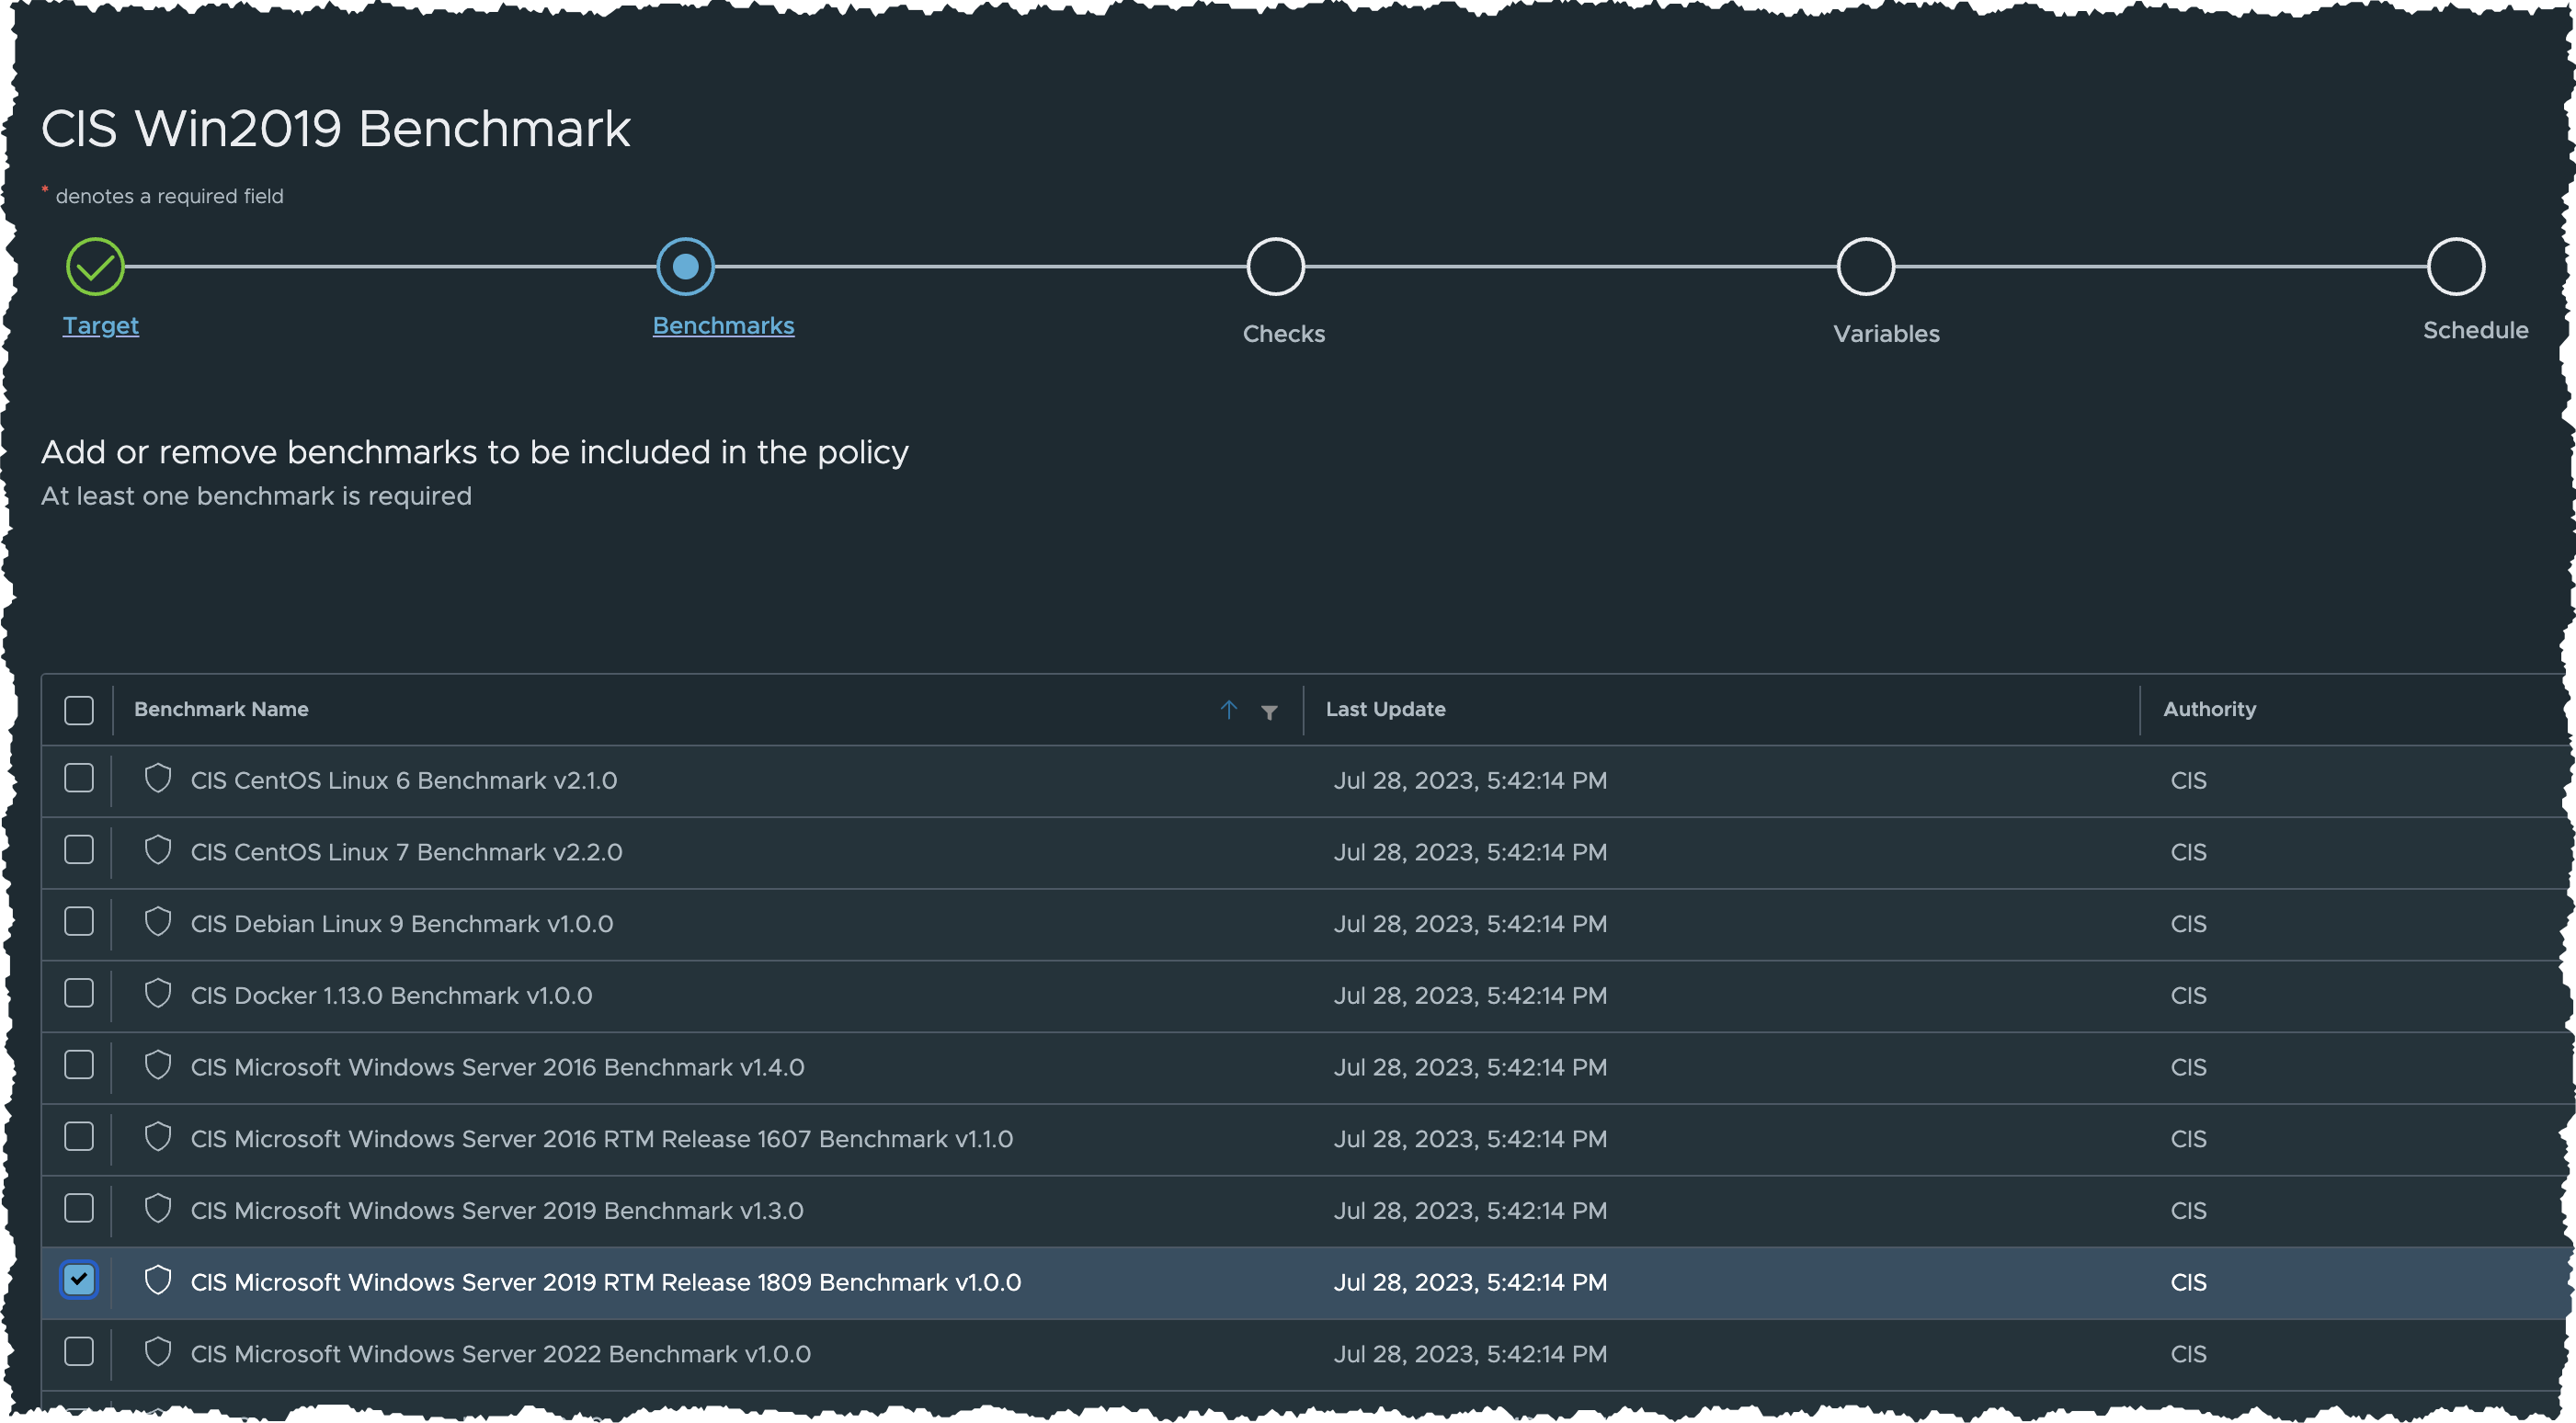
- In the Benchmarks step page:
- Check CIS Microsoft Windows Server 2019 RTM Release 1809 Benchmark v1.0.0
- Click NEXT button
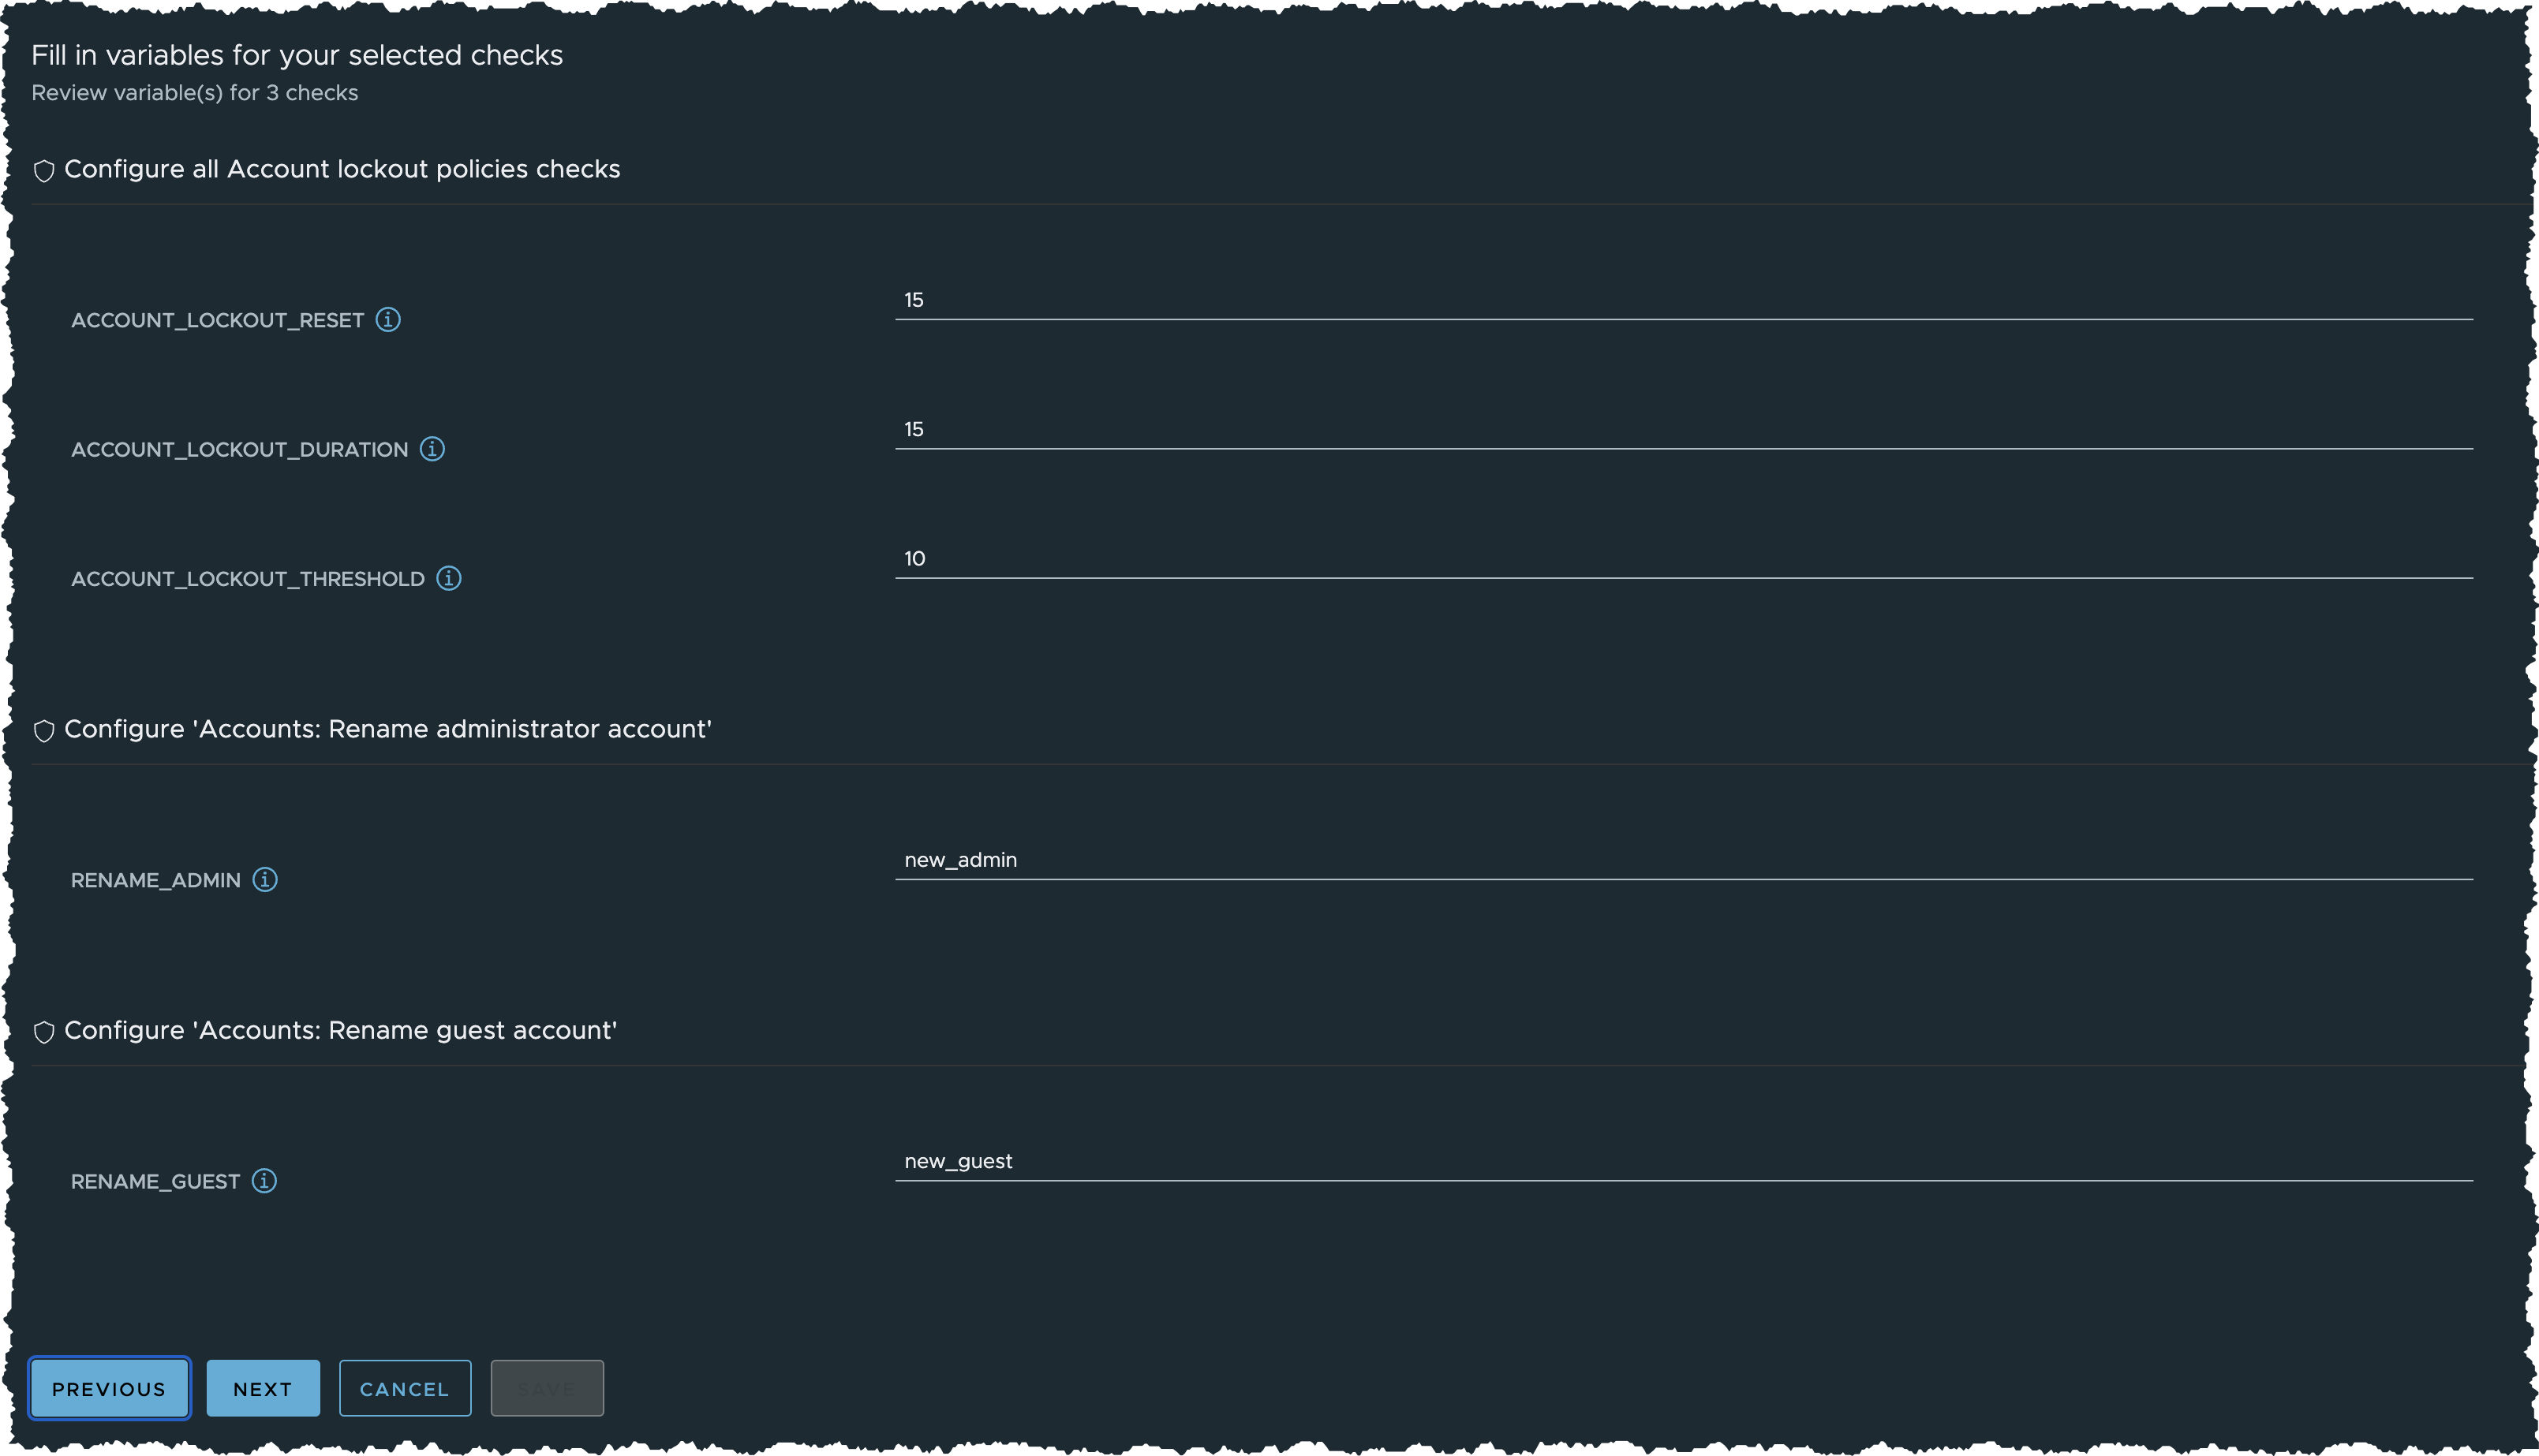
- In the Checks step page:
- Check the first three benchmark checks, for example:
- Configure ‘Accounts: Rename administrator account’
- Configure ‘Accounts: Rename guest account’
- Configure all Account lockout policies checks
- Click NEXT button

- Check the first three benchmark checks, for example:
- In the Variables step page:
- Leave all input values unchanged
- Click NEXT button
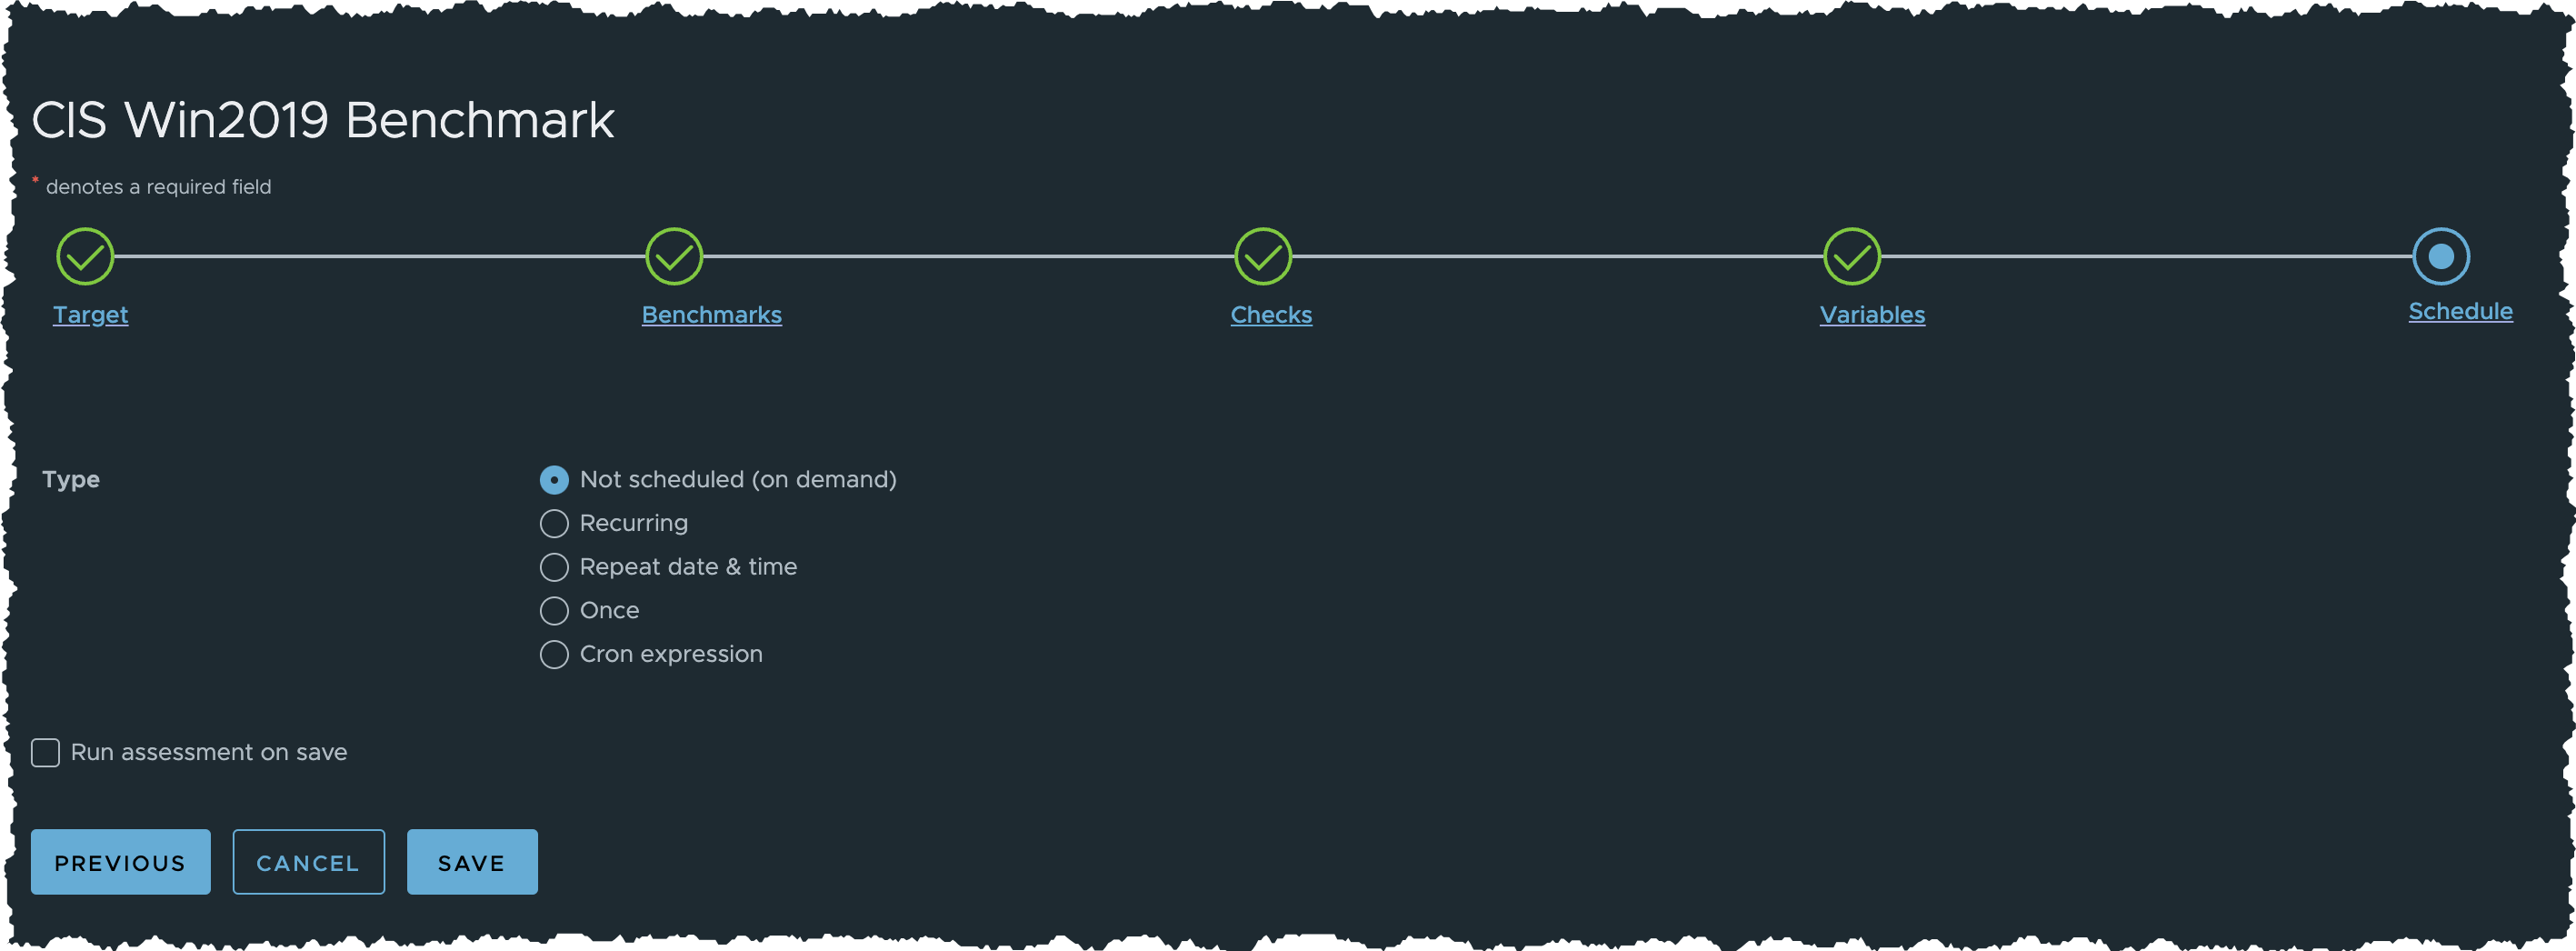
- In the Schedule step page:
- Select Not scheduled (on demand)
- Leave Run assessment on save unchecked
- Click SAVE button
Task C. Run Assessment
- (Optional) Click Compliance > Policies from the side menu
- (Optional) Locate and click CIS Win2019 Benchmark to open the policy you created
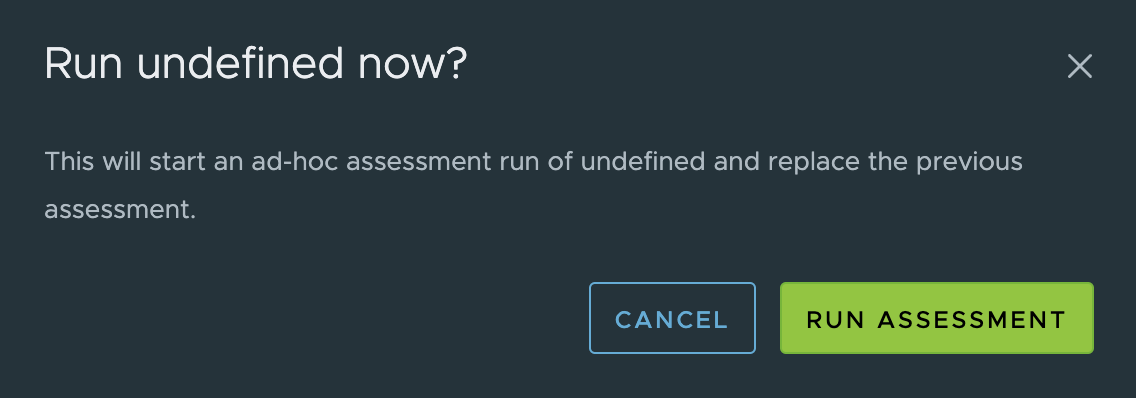
- Click RUN ASSESSMENT on the top right corner
- In the pop-up dialog
- Click RUN ASSESSMENT to confirm

- Click RUN ASSESSMENT to confirm
- In the pop-up dialog
- Wait until assessment is completed
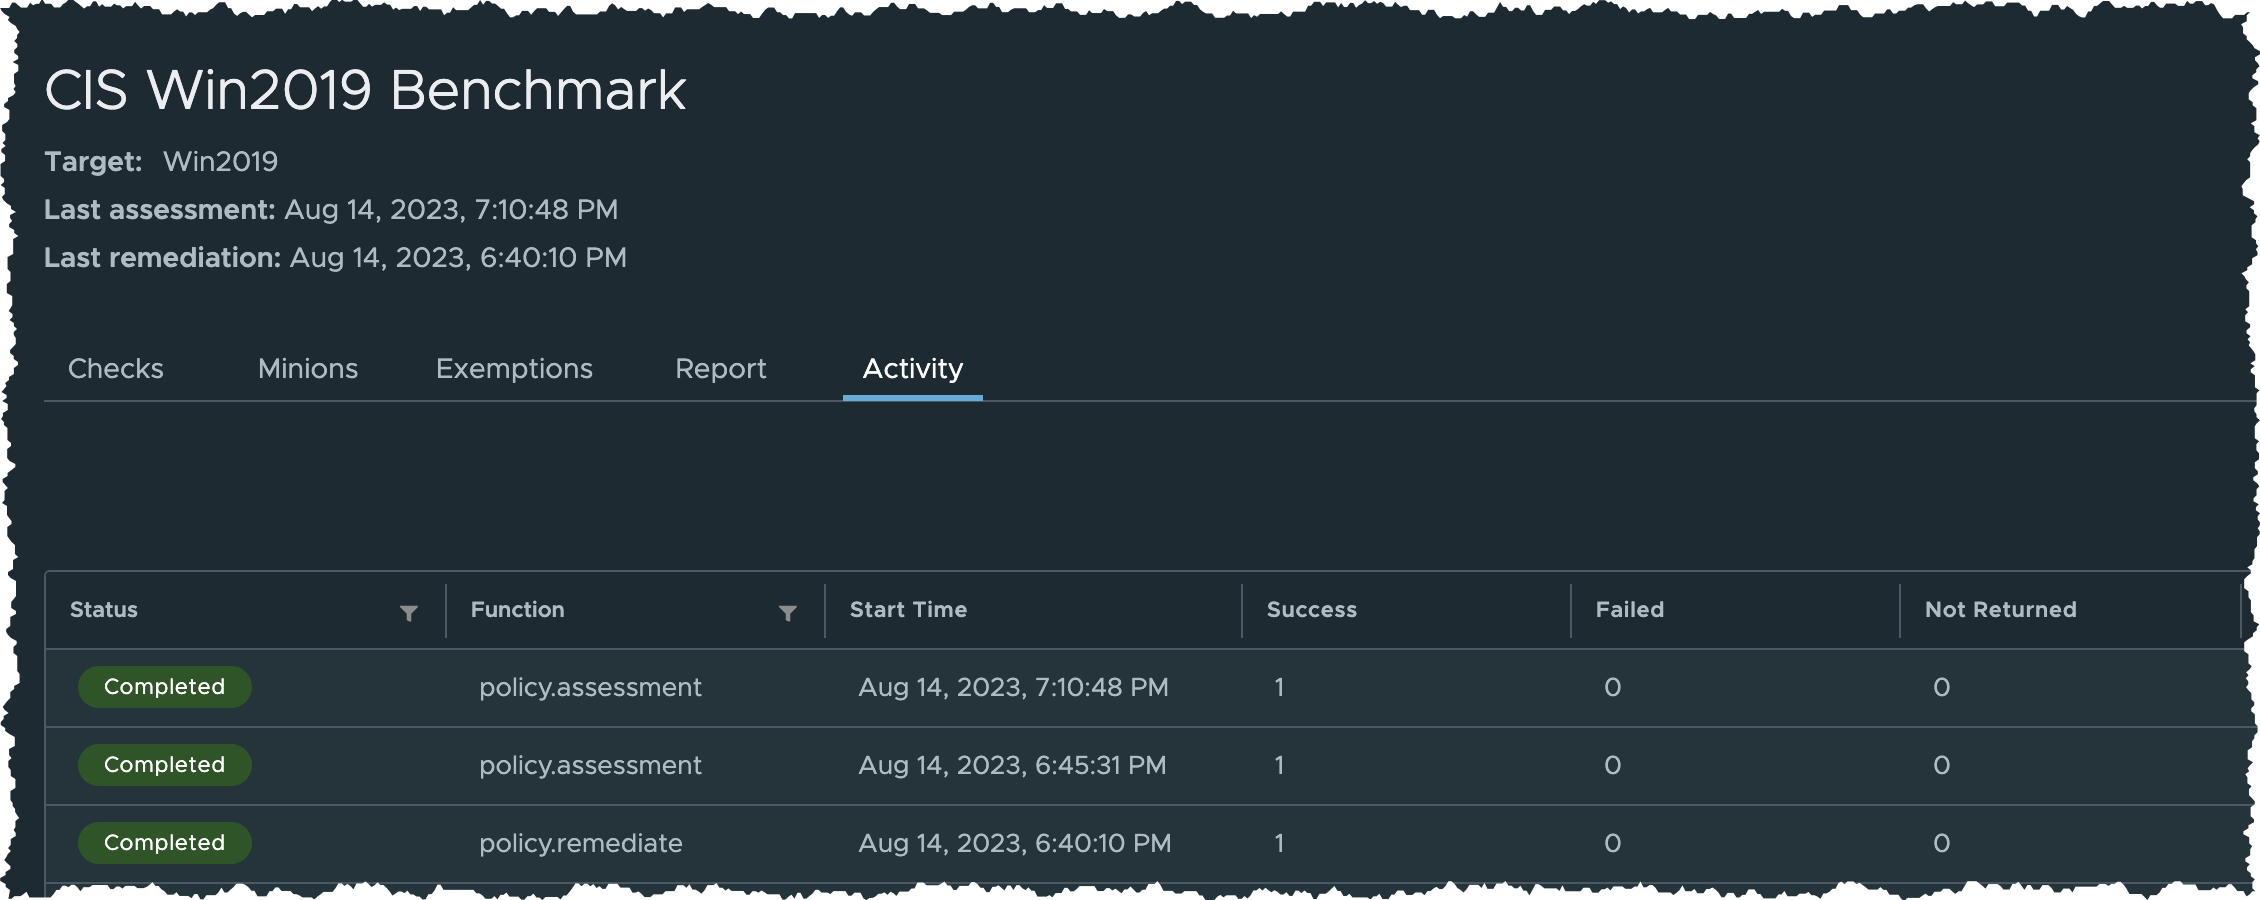
- Click Activity tab
- Click Refresh Icon periodically and wait until status of assessment becomes Completed
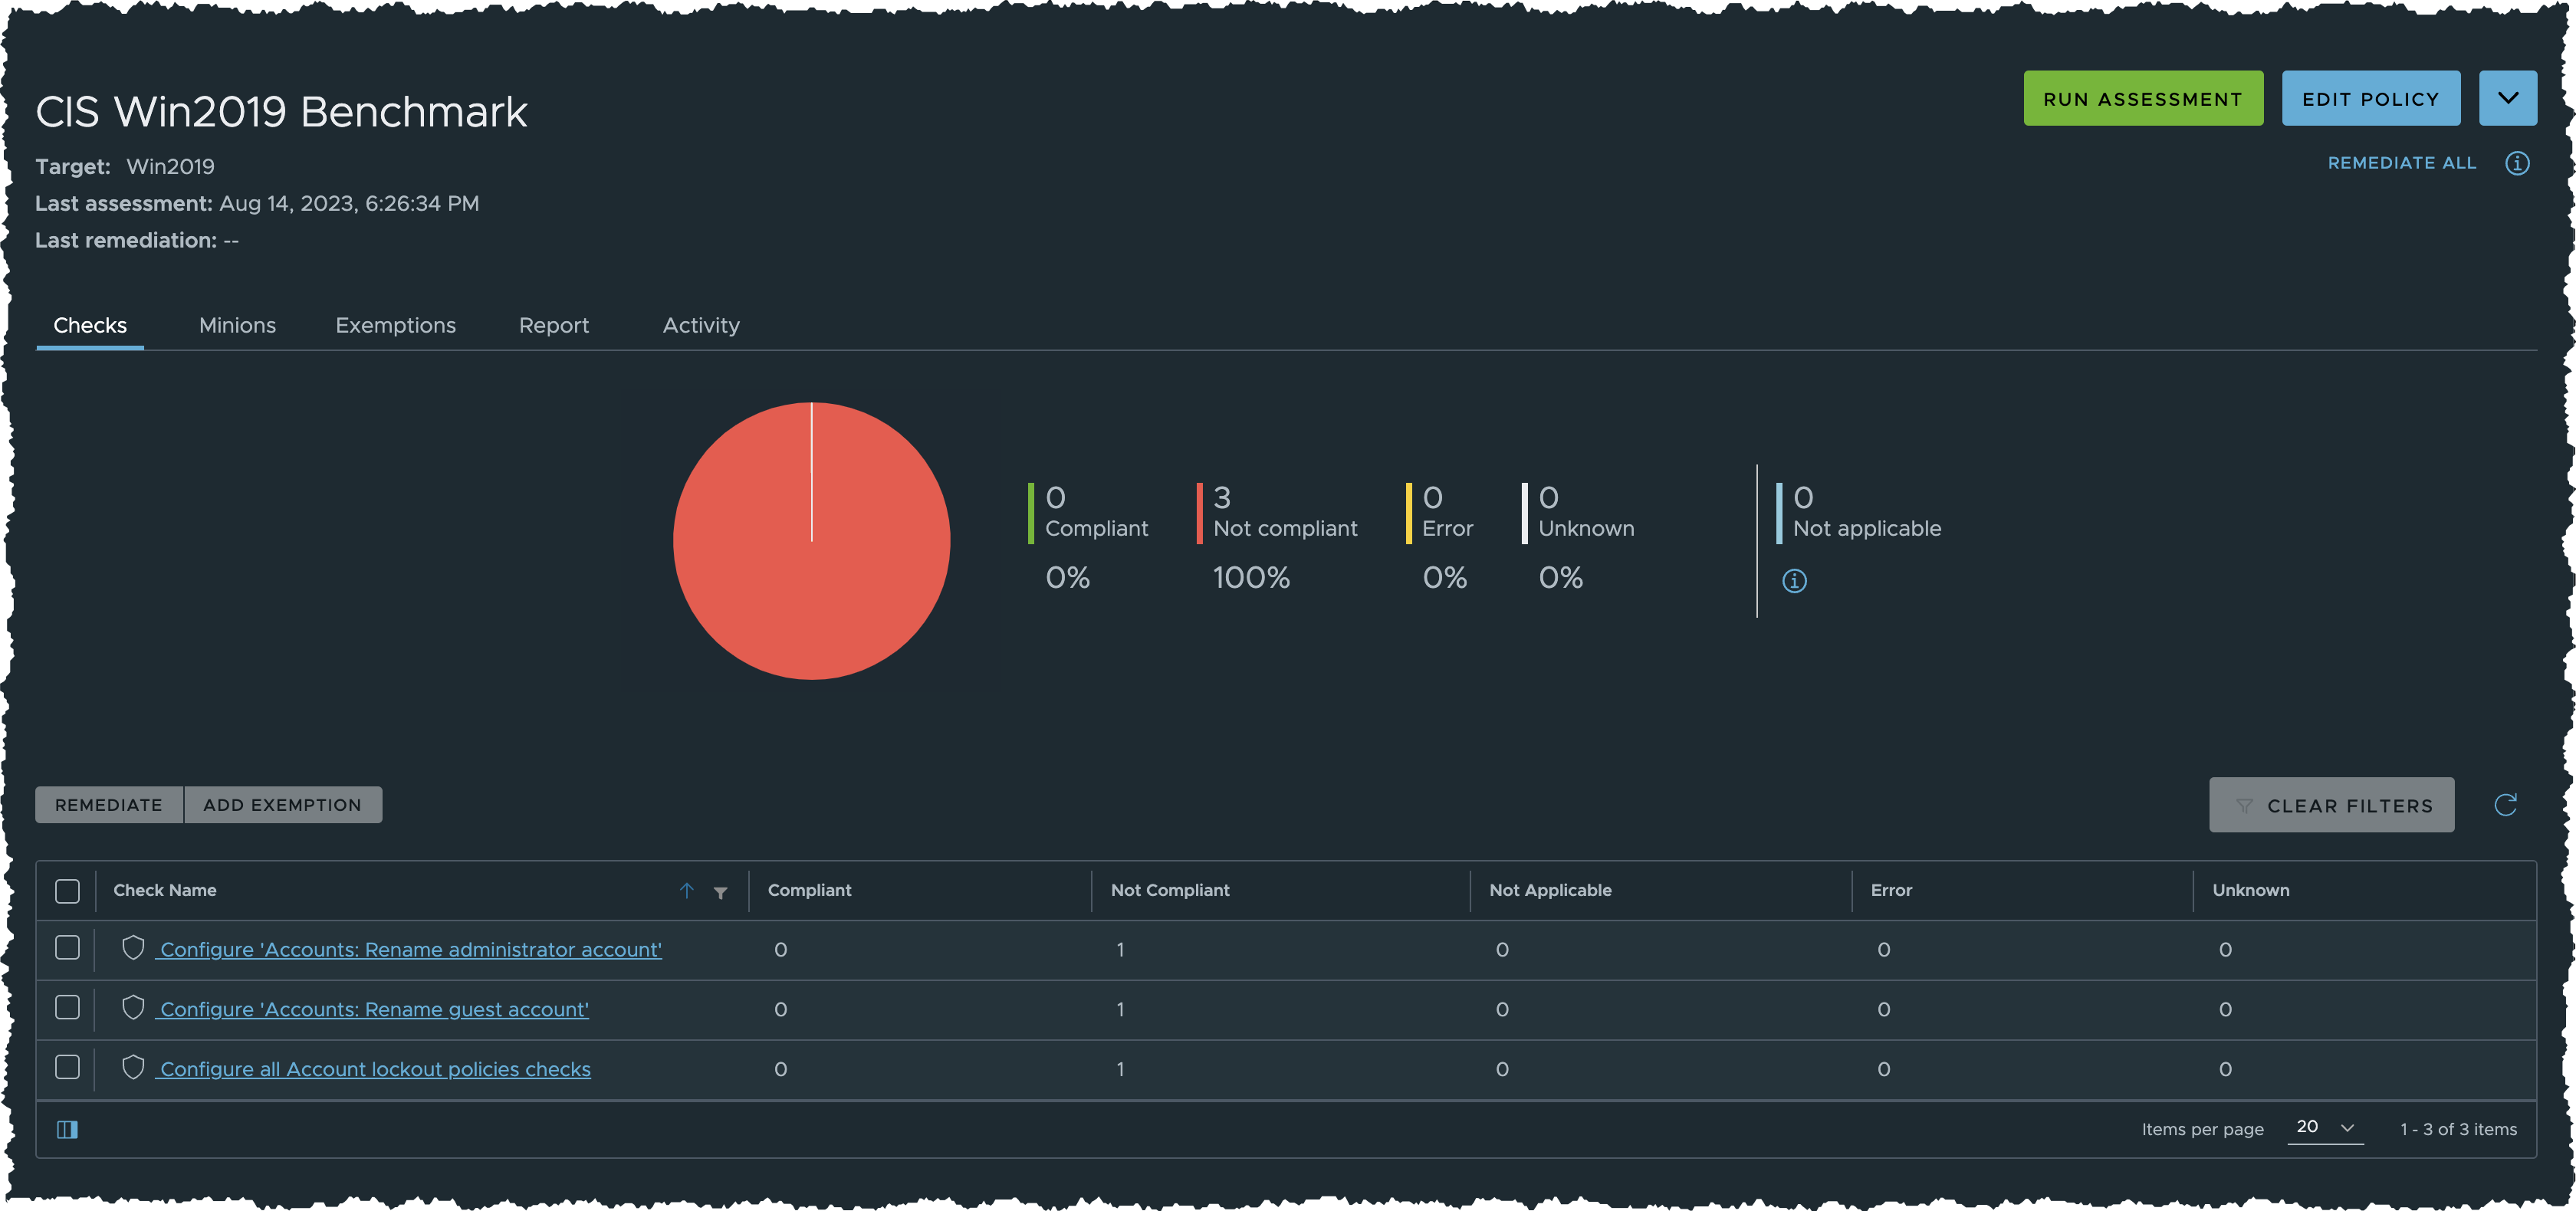
- Click Checks tab
- Examine the benchmark check results
- Examine the assessment results: Check name, Compliant & Not compliant
- Note the Compliant % & Not Compliant %, which will be compared to that after remediation
Task D. Remediate
- (Optional) Click Compliance > Policies from the side menu
- (Optional) Locate and click CIS Win2019 Benchmark to open the policy you created
- In CIS Win2019 Benchmark policy page
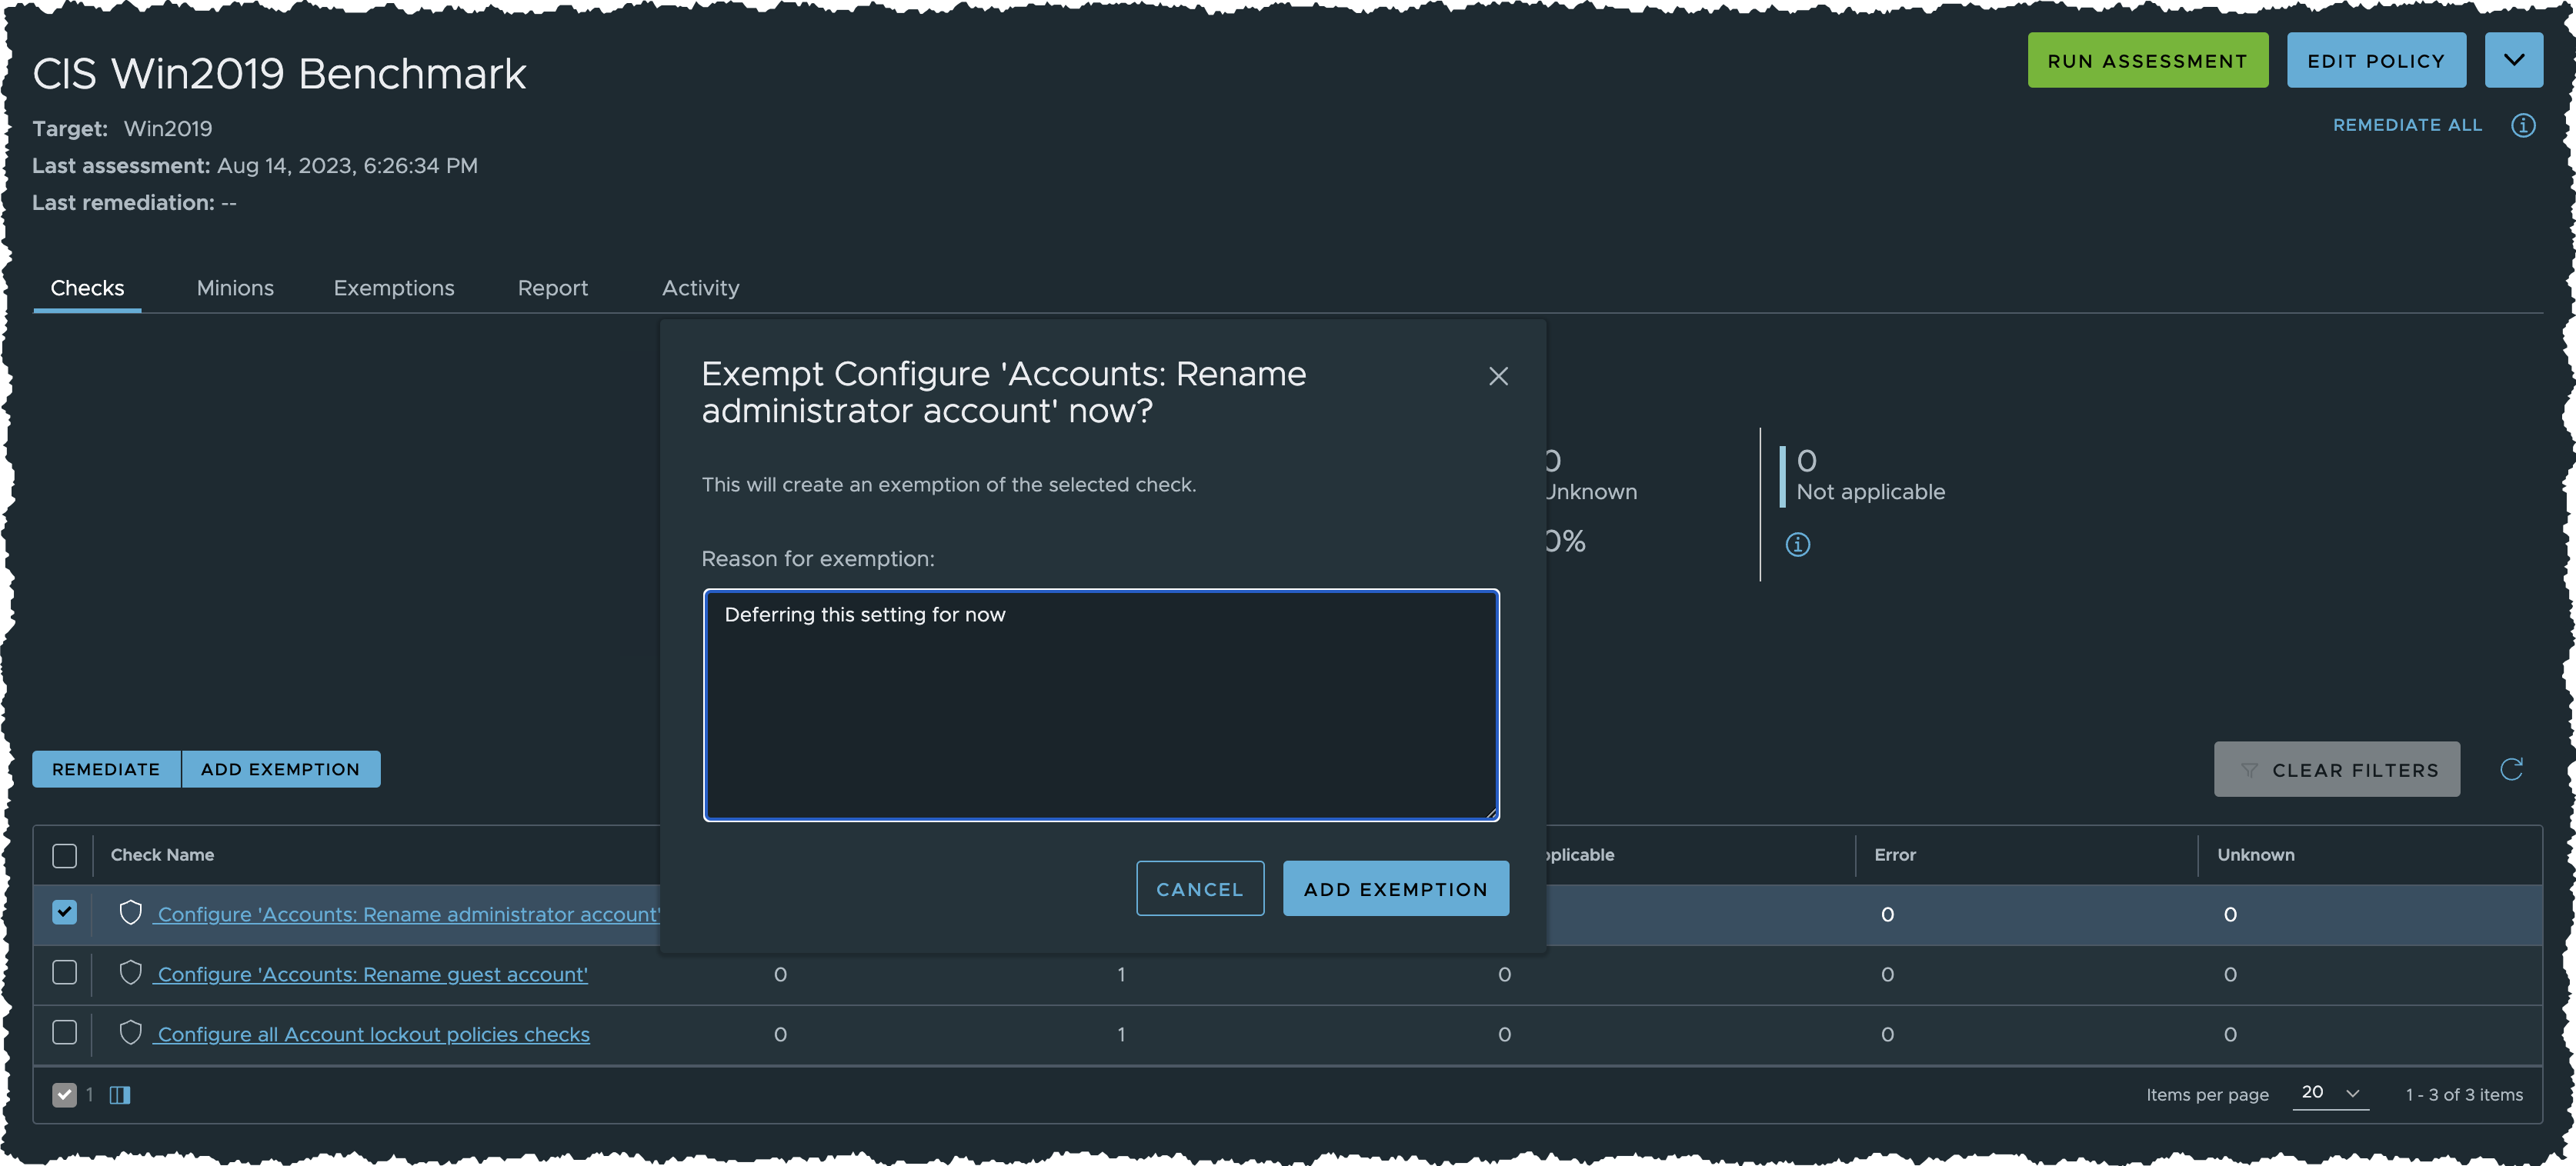
- Check the first benchmark check
- Click ADD EXEMPTION to temporarily ignore this check
- In the pop-up dialog, input following details
- Reason for exemption:
Deferring this setting for now - Click ADD EXEMPTION
- Reason for exemption:
- (This benchmark check will appear in the Exemptions tab)
- In the pop-up dialog, input following details
- Uncheck the first benchmark check
- Check the second and third benchmark check
- Click REMEDIATE to remediate minions non-compliant to this check
- In the confirmation dialoge
- Click REMEDIATE
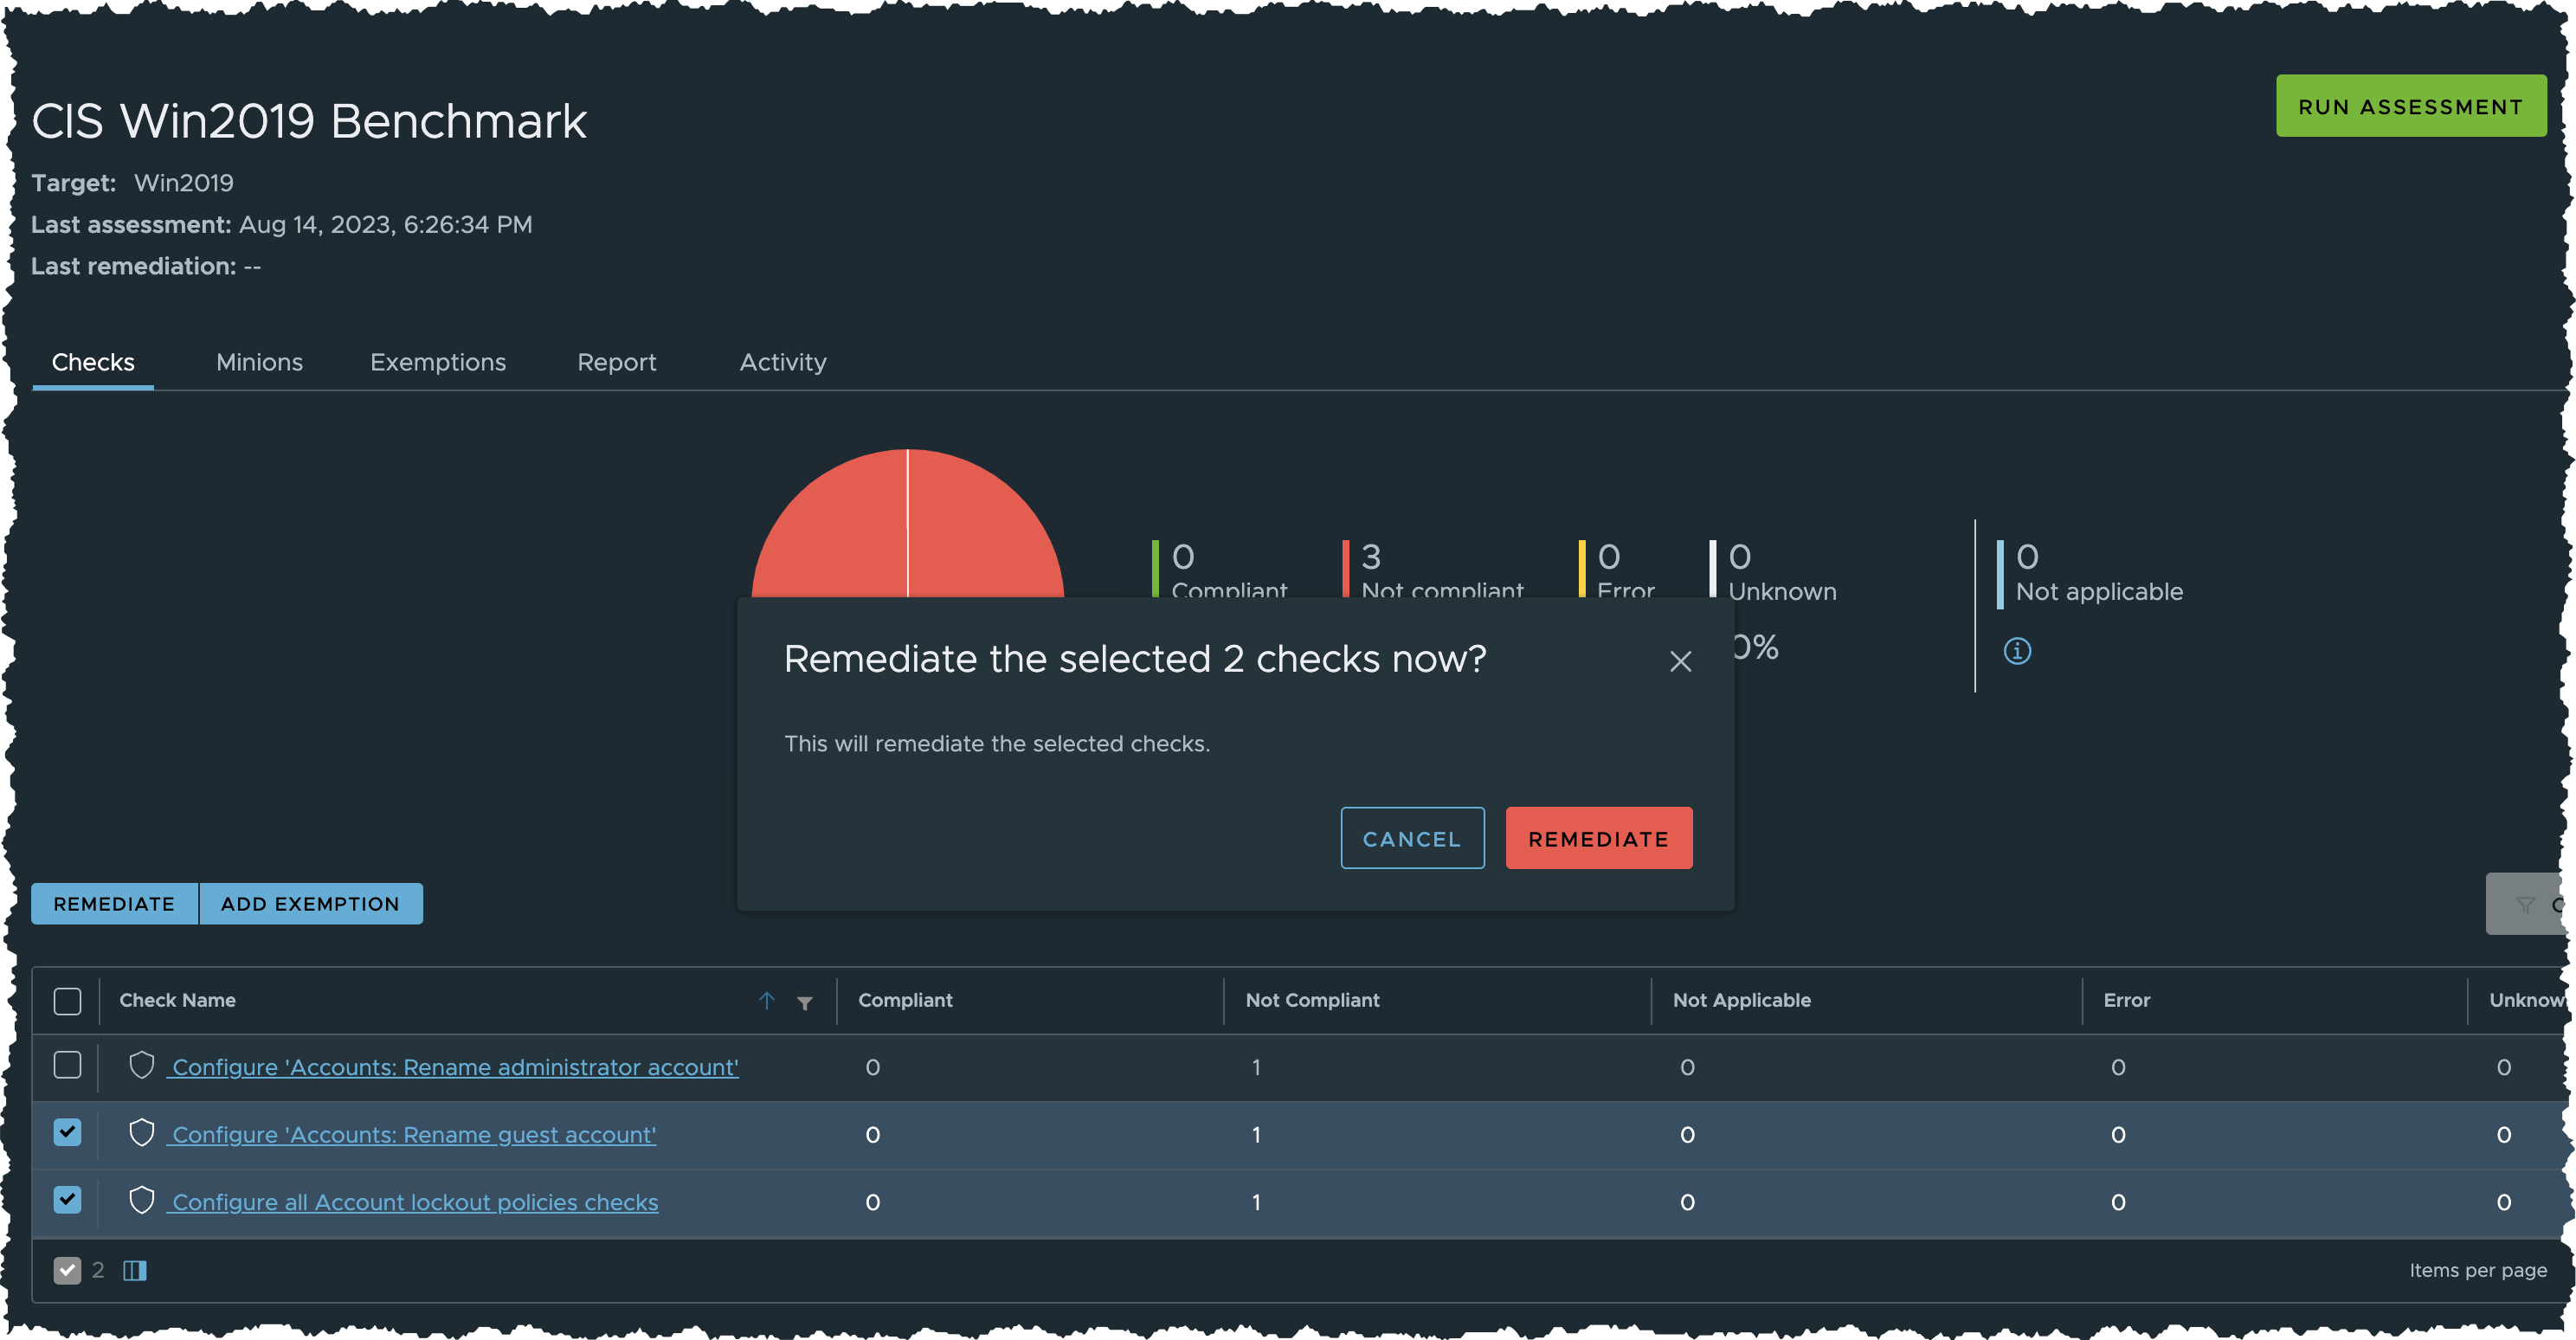
- Click REMEDIATE
- In the confirmation dialoge
- Wait until remediation is completed
- Click Activity tab
- Click Refresh Icon periodically and wait until status of remediation becomes Completed
- Click Checks tab to show policy summary
- Click RUN ASSESSMENT to run the assessment again
- In the pop-up dialog
- Click RUN ASSESSMENT to confirm
- In the pop-up dialog
- Wait until assessment is completed
- Click Activity tab
- Click Refresh Icon periodically and wait until status of assessment becomes Completed
- Click Checks tab to view updated compliance policy summary
Task E. Check Results
- (Optional) Click Compliance > Policies from the side menu
- (Optional) Locate and click CIS Win2019 Benchmark to open the policy you created
- Examine the benchmark check results in this policy
- Compliance level should now increased
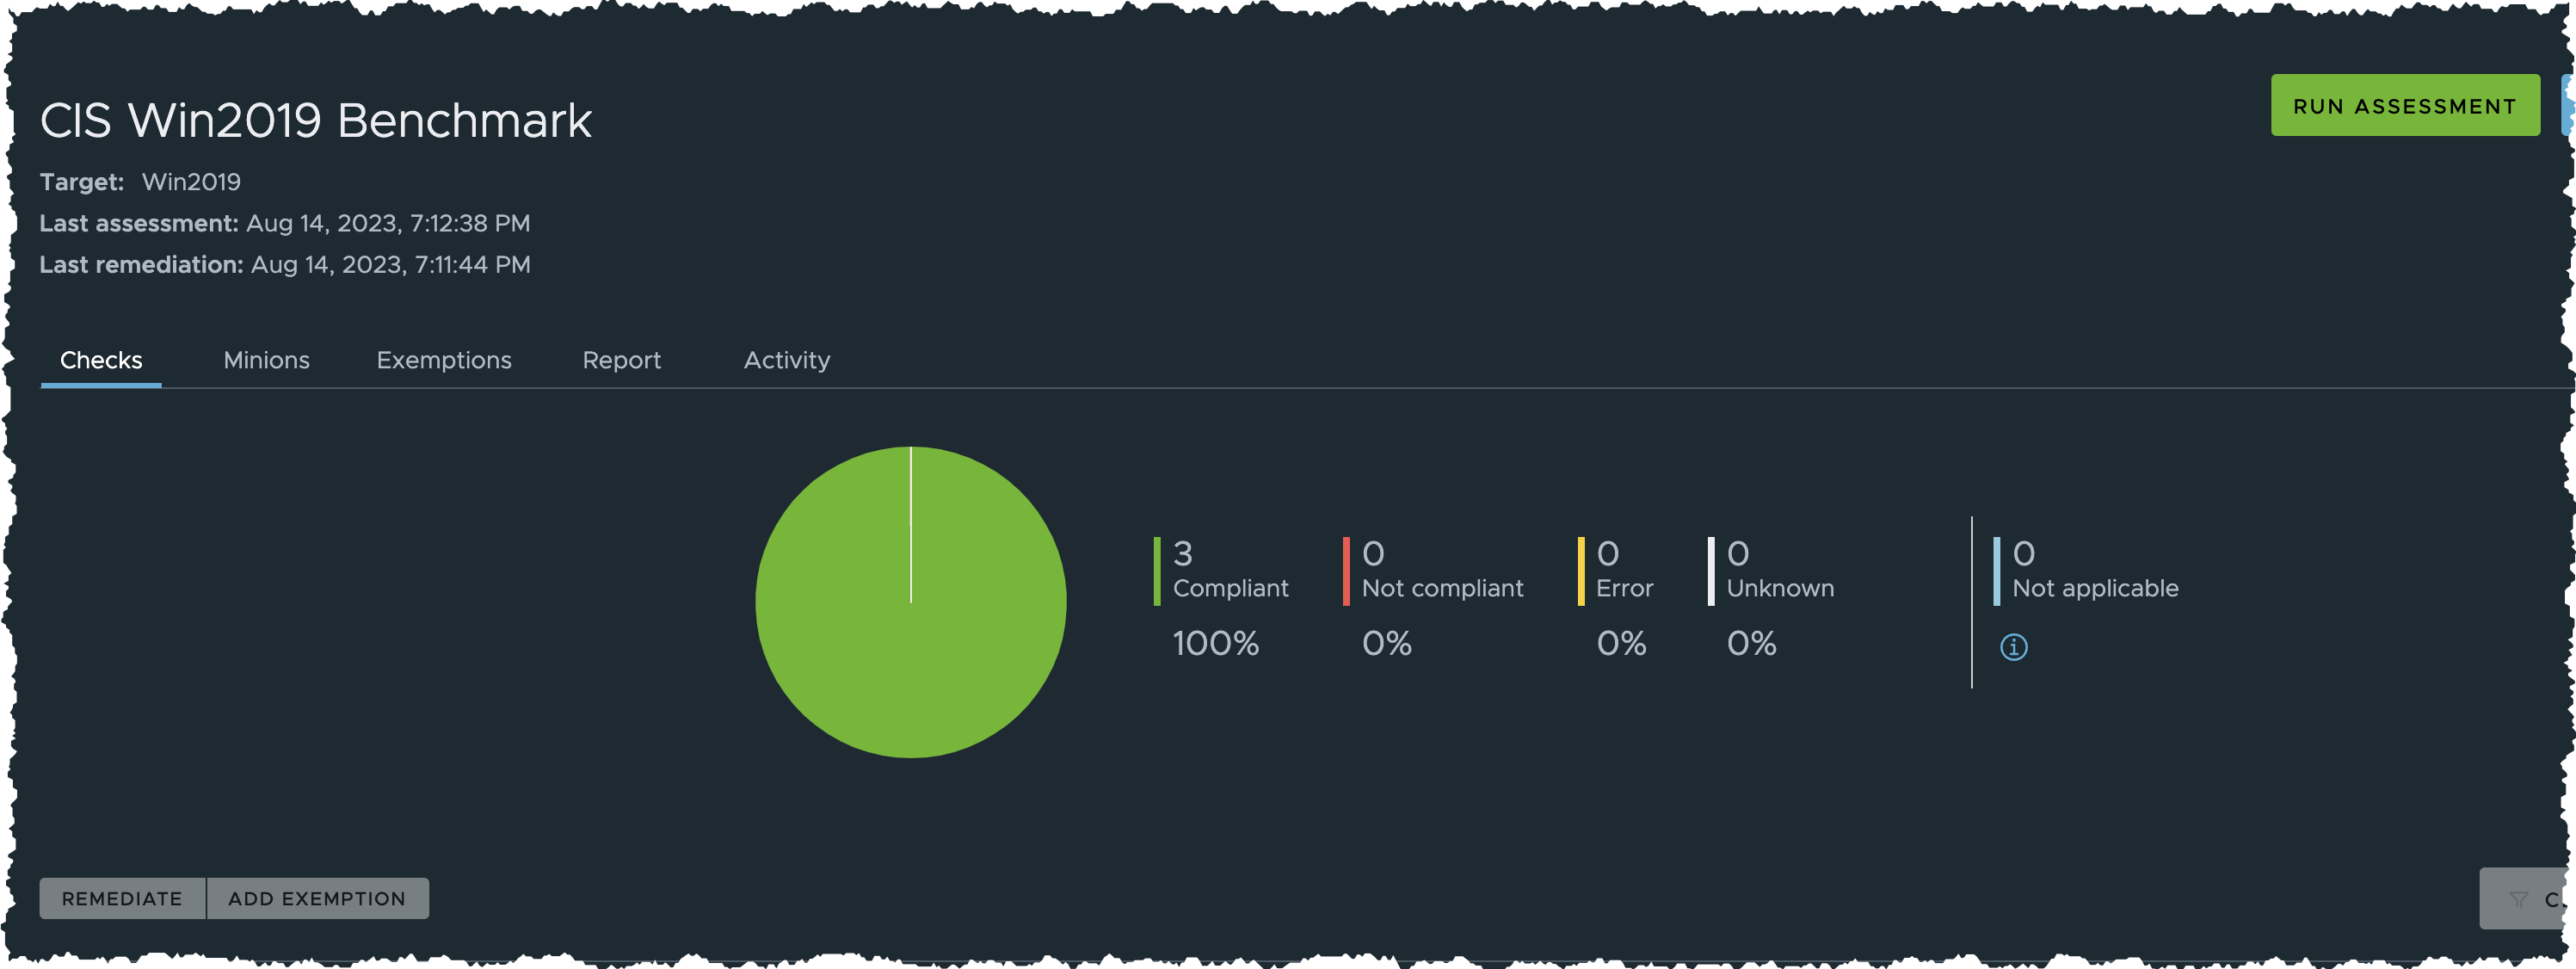
- Compliance level should now increased
- Click Compliance > Policies from the side menu
- The page will show oversall summary of all policies
- Examine the updated Overall Summary, Compliance Summary and Assessment Summary

Summary
VMware Automation for Secure Hosts enhances compliance oversight using established frameworks and streamlined corrective actions:
- Implementing industry best practices, such as CIS & DISA STIG for robust security hardening
- Enhancing visibility by providing compliance summaries and assessment reports
- Ensuring continuous adherence through automated compliance evaluations
- Enabling Swift and efficient compliance remediation through automation
- Creating tailor-made compliance benchmark check for unique needs using the Compliance SDK